 ダビグマ
ダビグマAn amazing feature has been released.


Oh! What feature is it??


It’s called the auto transcription feature!
Let me explain!
Introduction
This time, we will introduce the “Auto Subtitle Transcription” feature newly added in DaVinci Resolve 18.5 β3. Using this feature significantly streamlines the editing process. It’s especially user-friendly and beneficial for those starting in their 40s.
Overview of the Auto Transcription Feature
The auto transcription feature converts the spoken parts of a video file into text, allowing you to cut clips based on that text. This eliminates the traditional need to listen to each part of the video to cut unnecessary sections, greatly speeding up the editing process.
How to Use
1. Importing Files
- Launch DaVinci Resolve and import the video file you wish to edit into the media pool.
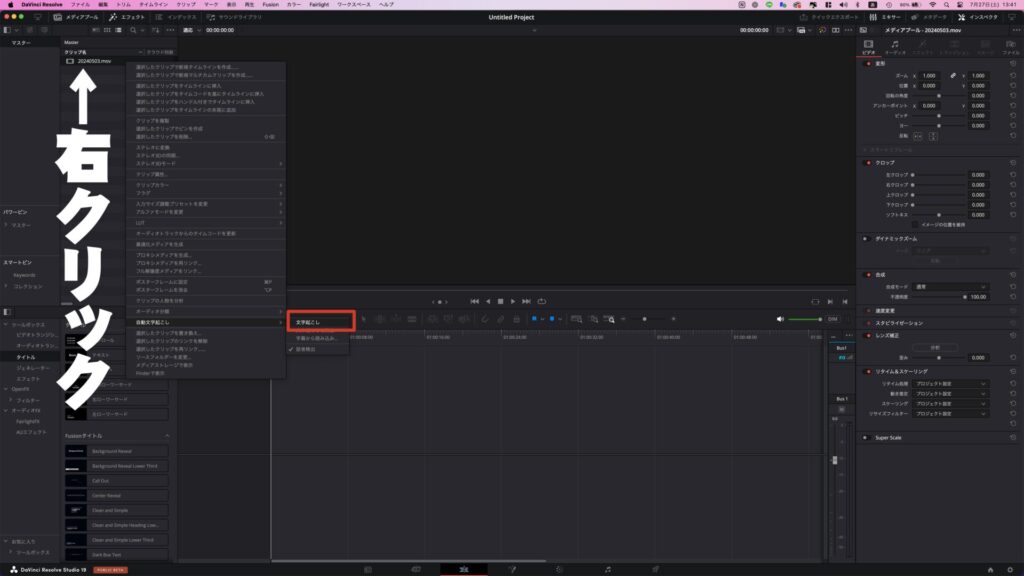
- Right-click on the imported file and select “Auto Transcription” → “Transcribe.”
For videos with multiple speakers, check “Speaker Detection” to have the AI differentiate between speakers.

2. Starting Transcription
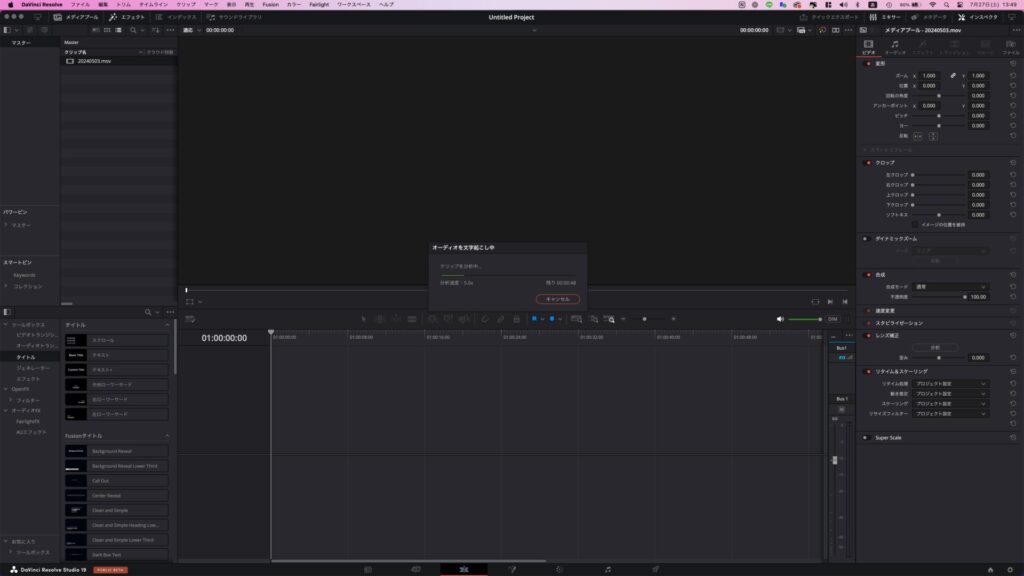
- Selecting “Transcribe” will initiate the clip analysis.
- 2. Depending on the video’s length and your PC’s specifications, the analysis may take some time (e.g., approximately 1 minute for a 15-minute video).

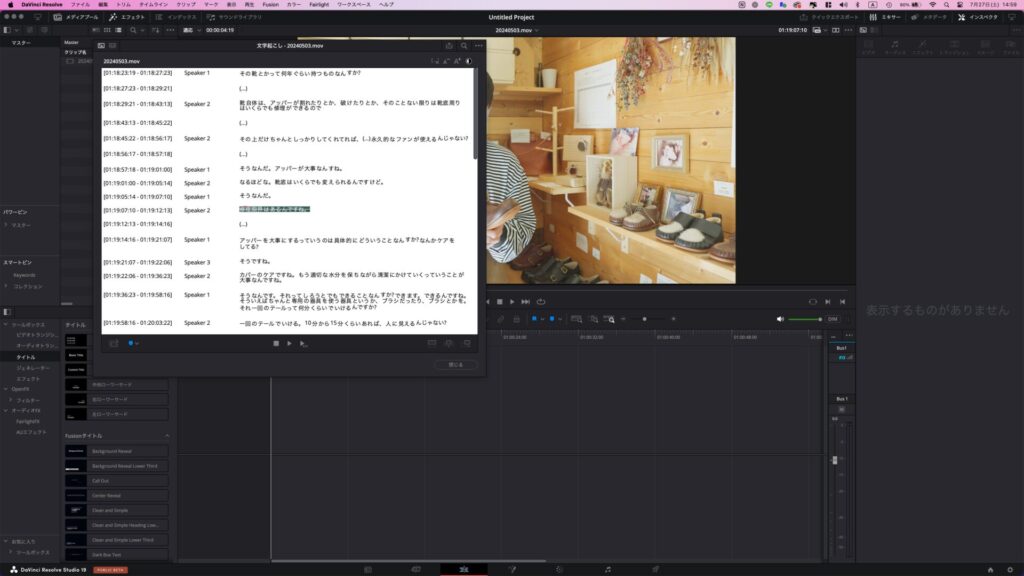
3. Reviewing Transcription Results
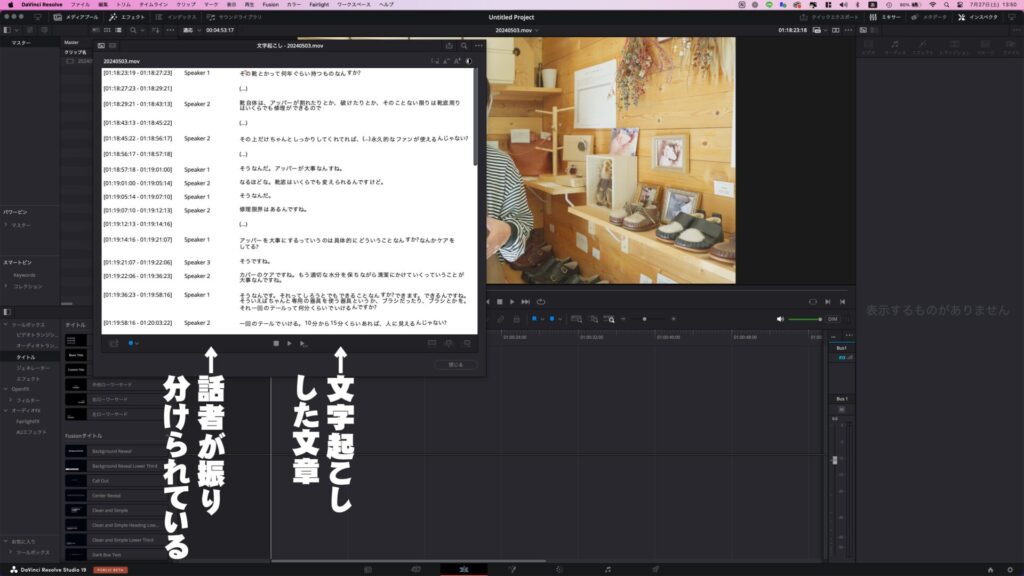
- Once the analysis is complete, the transcribed text will be displayed on the screen.
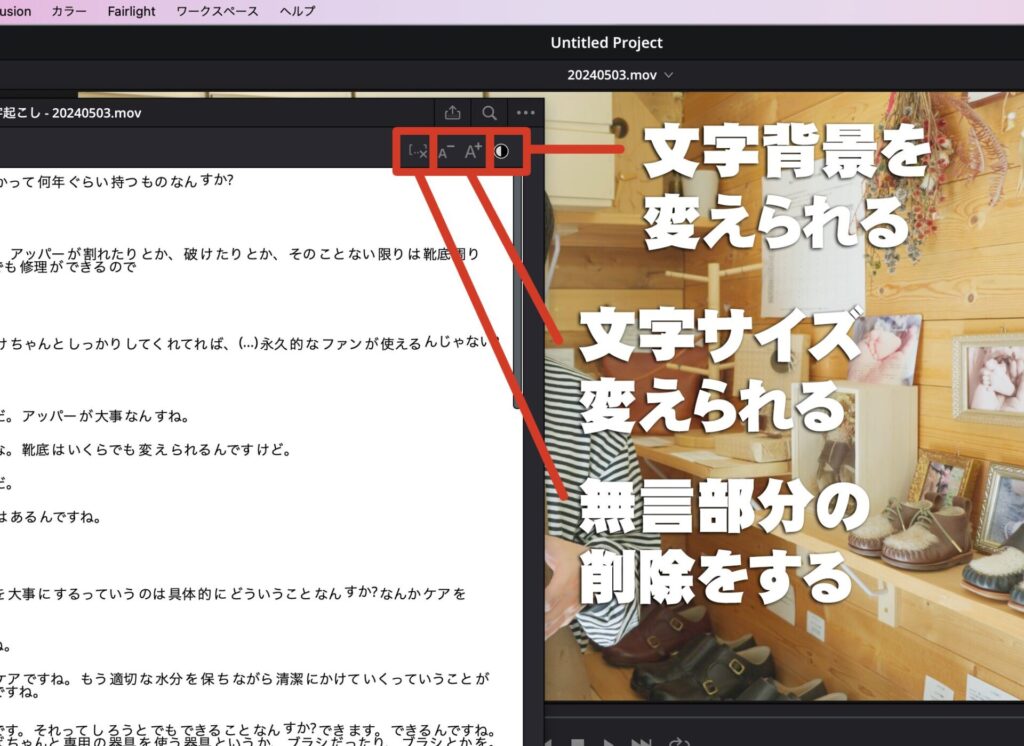
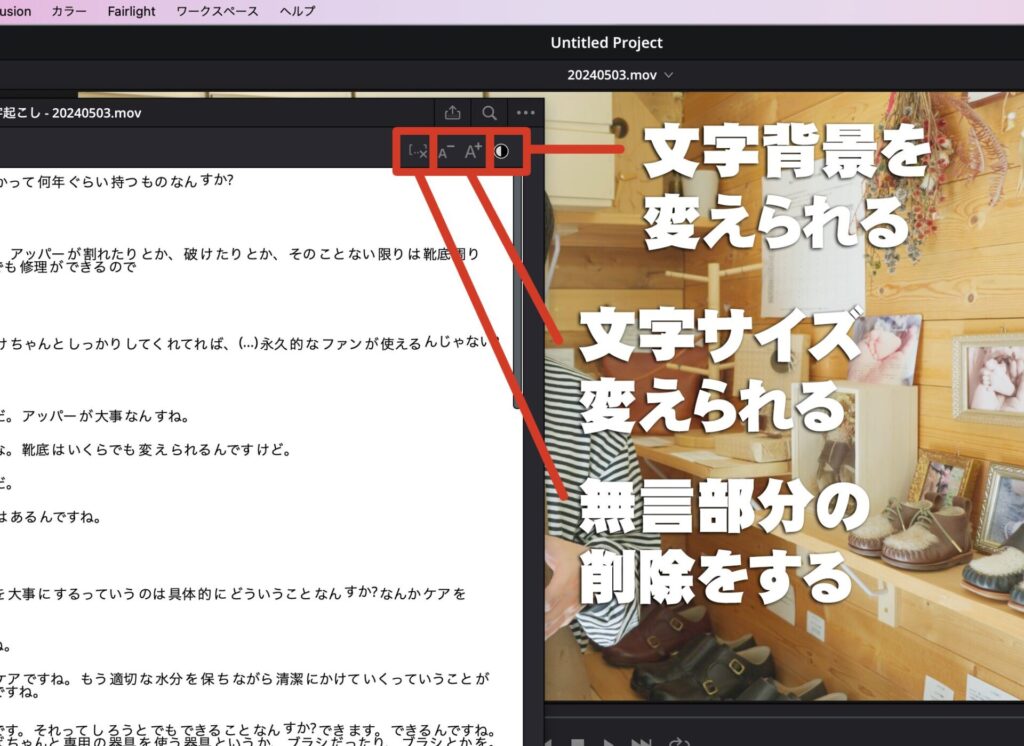
- You can switch background colors and adjust text size as needed.


4. Deleting Unnecessary Sections
- Silent sections are automatically marked with a red strikethrough, making them easy to delete.
- Select unnecessary dialogue sections, right-click to delete, or press the Delete key on your keyboard to remove them.

5. Placing Text onto the Timeline
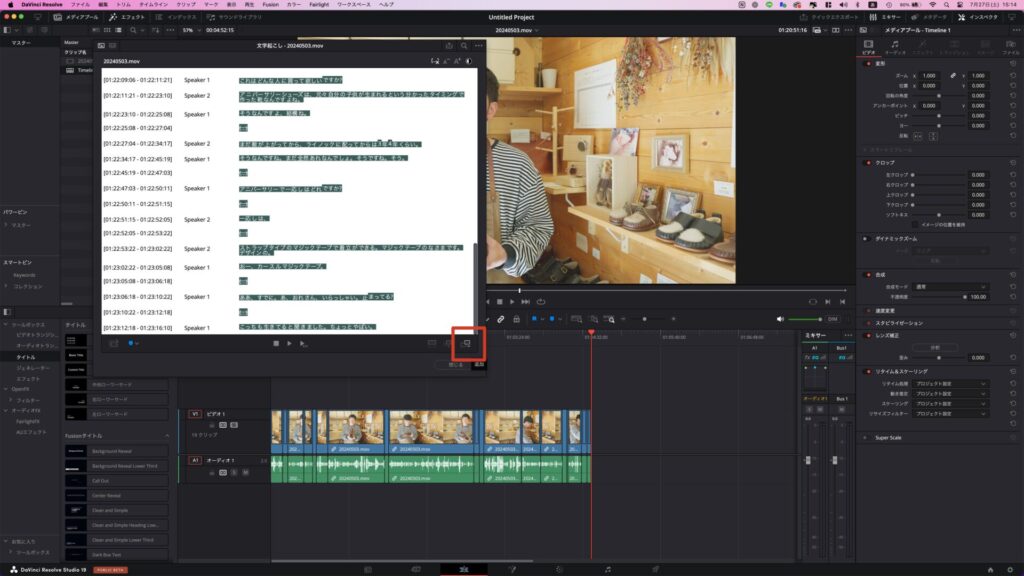
- Select all text (Command+A on Mac, Control+A on Windows), then click the icon in the bottom right to place it onto the timeline.
- This completes the cut editing.

Other Useful Features
The auto transcription feature offers other convenient functions.
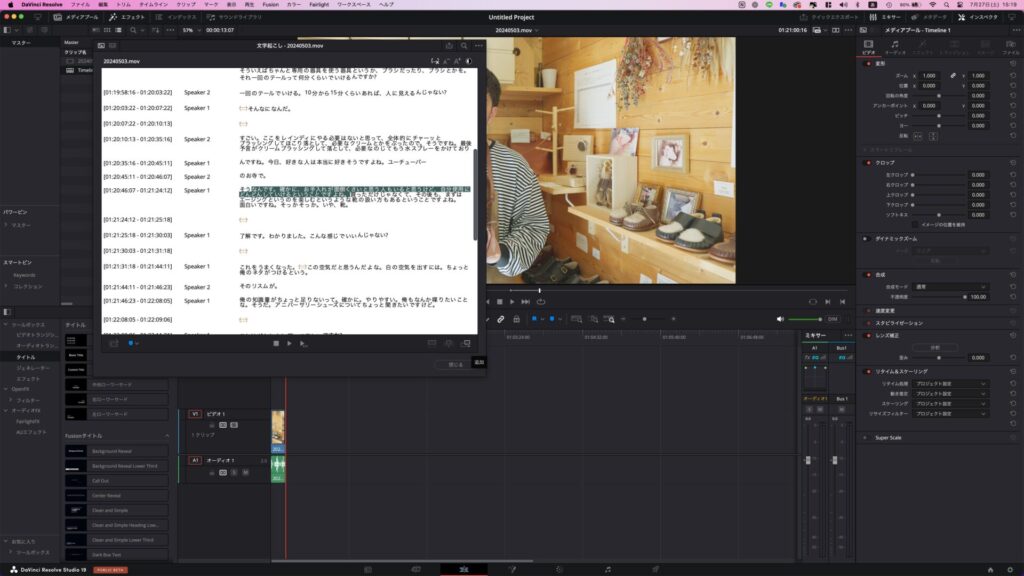
- Inserting Selected Text Sections: Select the text and click the icon in the bottom right to place it onto the timeline.

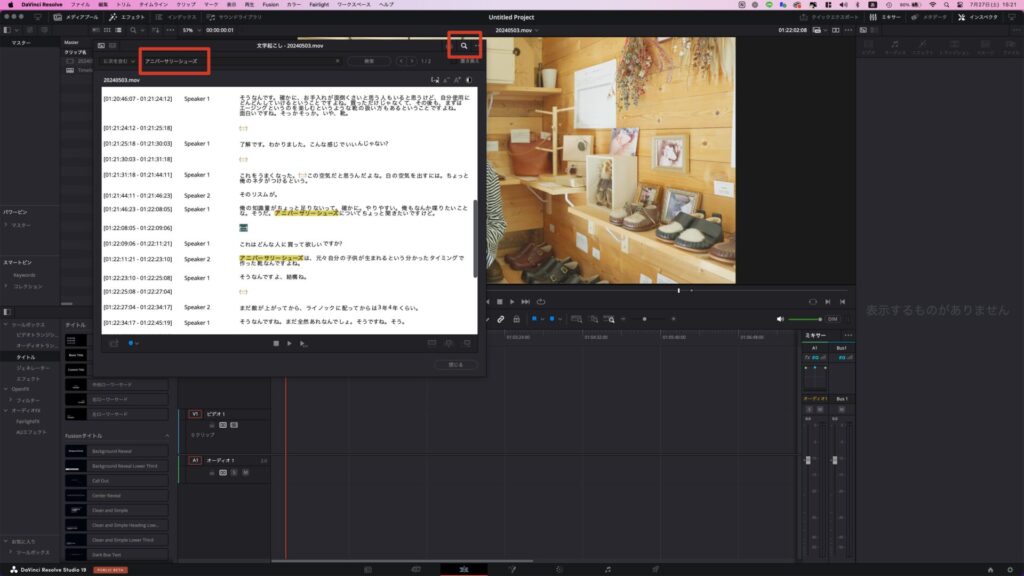
- Search Function: Click the magnifying glass icon in the top right to search for specific keywords and jump directly to those sections. For example, searching for “anniversary shoes” will highlight that part.

- Automatic Removal of Silent Sections: Using the “Remove Silent Portions” feature allows for automatic deletion of silent parts.

Creating Subtitles from Auto Transcription
In DaVinci Resolve 18, even after auto transcription, creating subtitles required re-analysis. However, starting from DaVinci Resolve 19, this is no longer necessary, allowing for smoother subtitle creation.
Steps to Create Subtitles from Auto Transcription
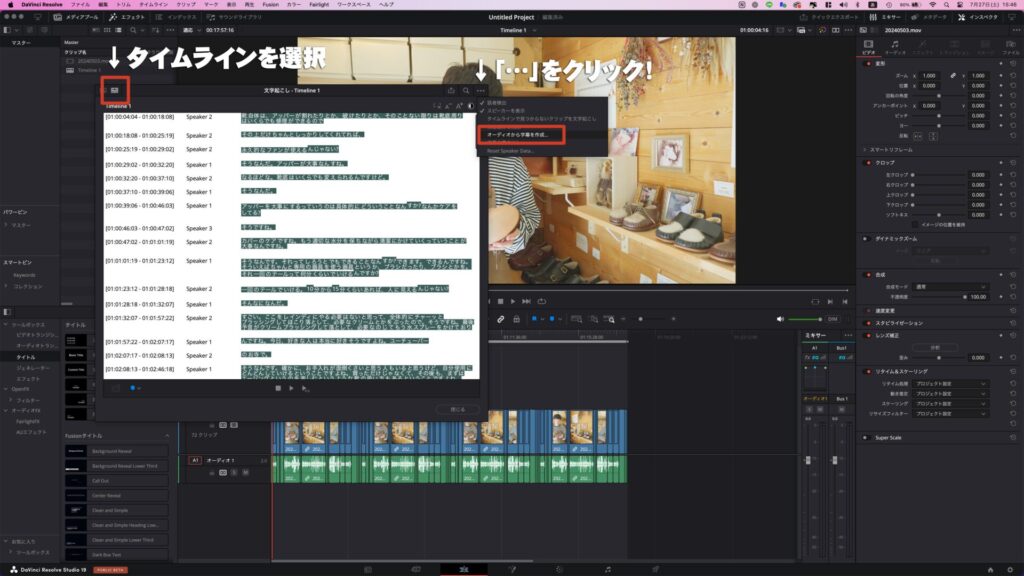
- Select the “Timeline” tab in the top left. Click the “…” in the top right and choose “Create Subtitles from Audio.”

- Choose a caption preset and click “Create”:
- From the “Caption Preset” dropdown, select the subtitle style you wish to use (e.g., Subtitle Default).
- Adjust settings for character count and line count as needed. The default character count is set to “42,” but YAMACO sets it to around “20.”
- Once settings are configured, click “Create” to begin automatic subtitle generation.
Conclusion
Leveraging the auto transcription feature can significantly enhance your video editing efficiency. It’s an intuitive and user-friendly tool, especially for those starting in their 40s. Available in the paid version of DaVinci Resolve Studio, we encourage interested individuals to give it a try. This blog will continue to introduce various features of DaVinci Resolve in the future.




Comments