 YAMACO 40th
Adding subtitles is really tedious.
Isn’t there a quicker way to do it?


Yes! For those struggling with subtitles!
DaVinci Resolve has an automatic subtitle feature!


Oh! I’ve been waiting for that!
Please teach me right away!


Alright! I’ll teach you!
Introduction
DaVinci Resolve is a video editing software widely used by both professionals and beginners. Notably, the latest update has added an automatic subtitle generation feature that supports Japanese, making it even more user-friendly. This enhancement significantly boosts video editing efficiency. In this article, we will provide a detailed explanation of the basic operations of DaVinci Resolve and how to utilize the automatic subtitle feature.
Setting Up Automatic Subtitle Generation
To use the automatic subtitle feature, follow these steps on the Edit page:
- Select the Clip on the Timeline:
- Place the clip you want to add subtitles to on the timeline and select it.
- Select “Create Subtitles from Audio” from the Menu:
- Click on “Timeline” from the top menu.
- Select “Create Subtitles from Audio.”
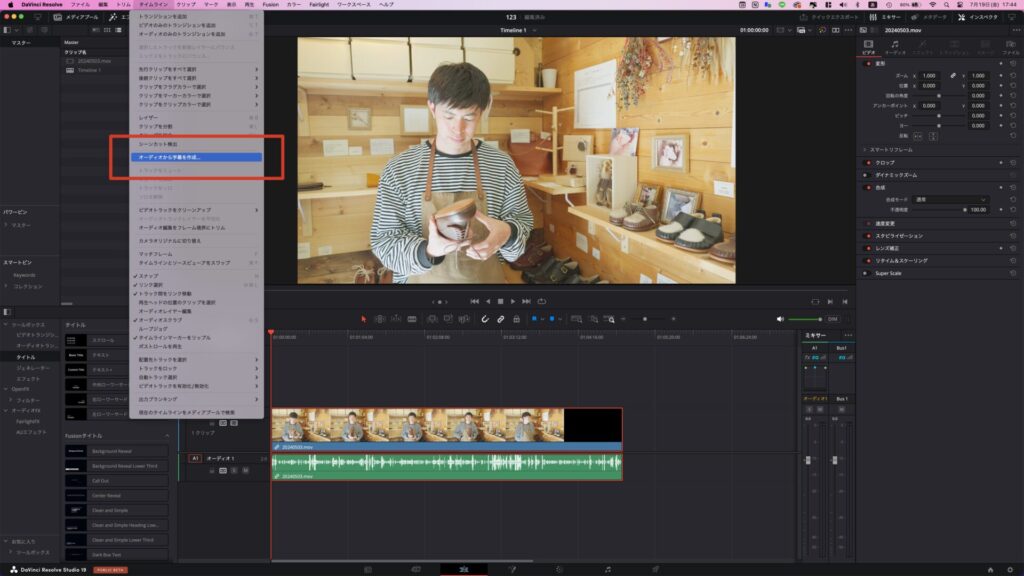

- 3. Select “Japanese” in Language Settings:
- A popup window will appear; select “Japanese” from the “Language” dropdown menu.
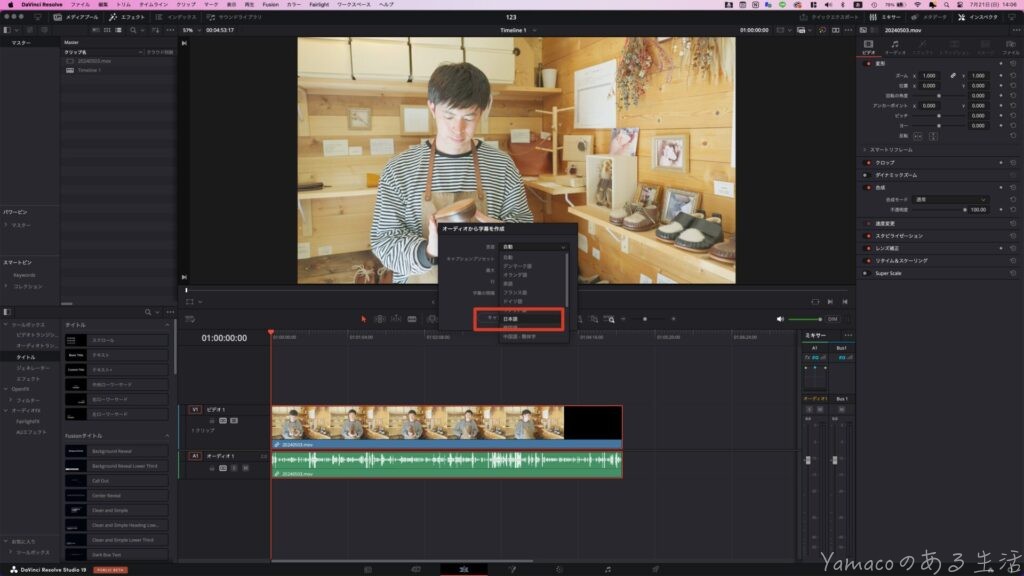

- 4. Select Caption Preset and Click “Create”:
- Choose your desired subtitle style from the “Caption Preset” dropdown (e.g., Subtitle Default).
- Adjust settings for character count and line count as needed. The default character count is set to “42,” but YAMACO sets it to around “20.”
- Once settings are complete, click “Create” to start automatic subtitle generation.
Creating Japanese Subtitles
The process of creating Japanese subtitles using the auto subtitle generation feature is as follows.
- After Configuration, Clip Analysis Begins:
- Clicking “Create” prompts DaVinci Resolve to start analyzing the audio within the clip. This analysis may take several minutes.
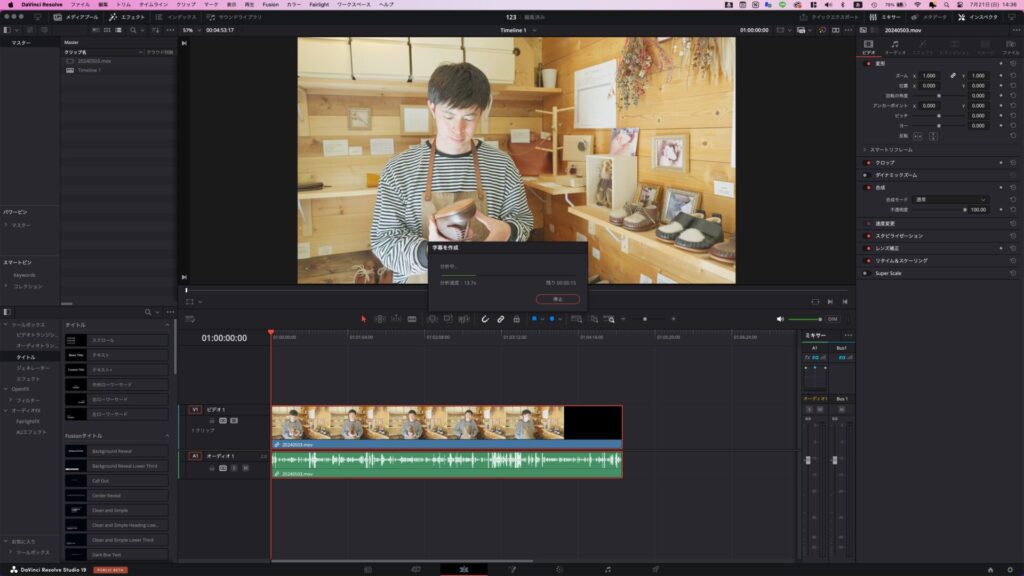

- Upon Completion of Analysis, a Subtitle Track Appears on the Timeline:
- Once the analysis is complete, a new subtitle track is automatically added to the timeline, displaying the subtitles.
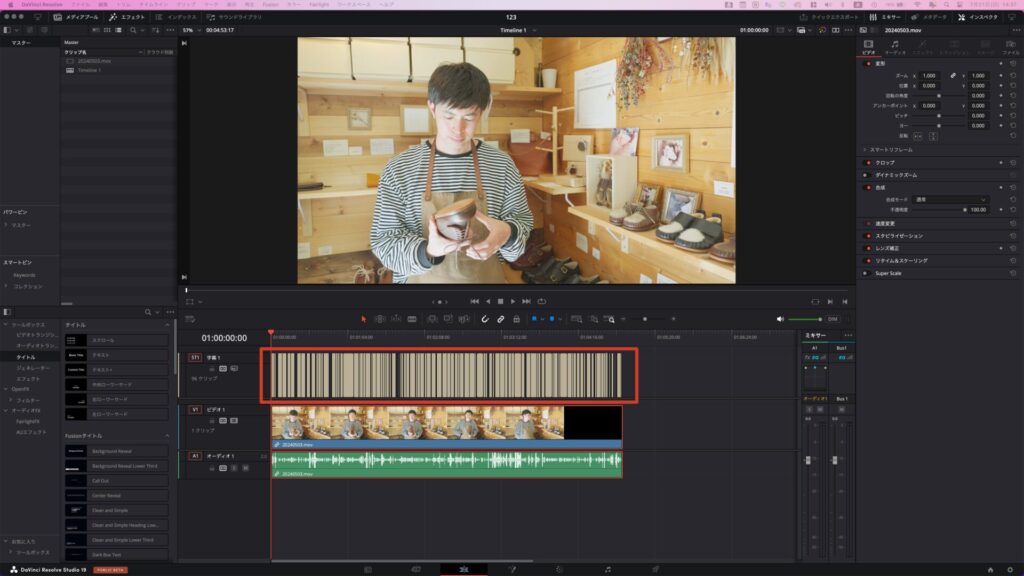

- Edit the Subtitle Track and Modify Font or Color as Needed:
- Select the subtitles within the subtitle track, click the “Track” tab in the Inspector panel, and adjust the font, size, color, background color, and other settings.
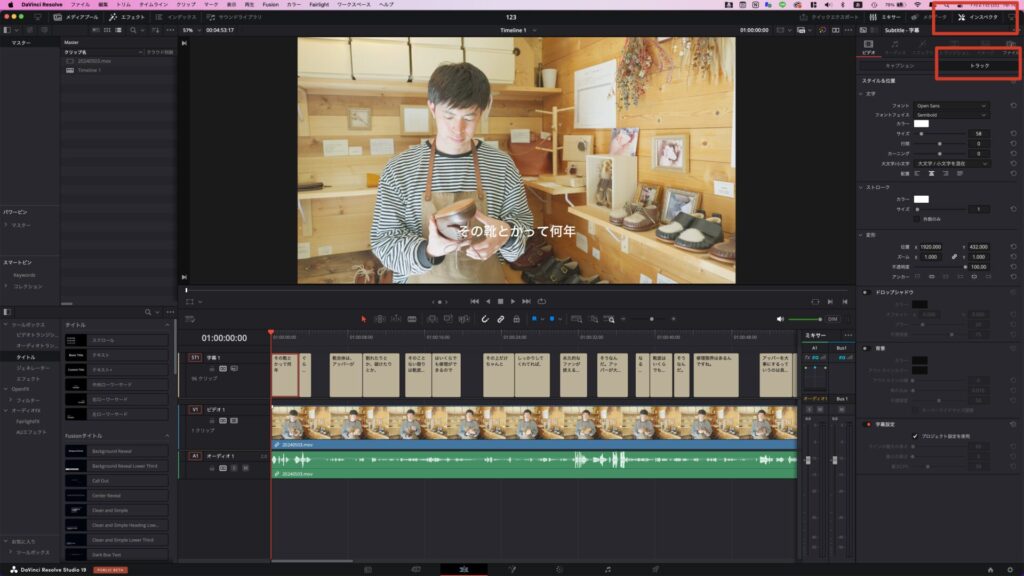

This allows you to easily add Japanese subtitles.
Export Settings After Creating Subtitles
Here’s how to embed subtitles into your video when exporting in DaVinci Resolve. To ensure subtitles are included in the video, you need to select “Burn into Video.” Follow these steps to configure the settings:
- Export Settings:
- Navigate to the “Deliver” page.
- In the “Render Settings” panel, choose the format and codec for output. For this example, we’ll use “Custom Export.”
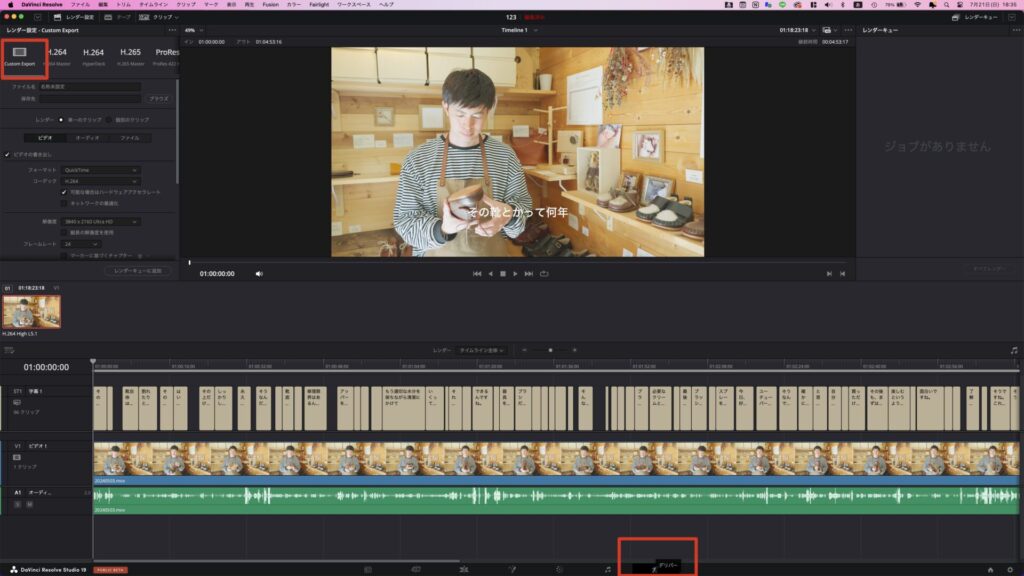

- Subtitle Export Options:
- Locate the “Subtitle Settings” section within the “Render Settings” panel.
- Check the box for “Export Subtitles” and set the method to “Burn into Video.” If this is not selected, the exported video will not include the subtitles.
※Note: If you choose “As Separate File,” the subtitles won’t be embedded in the video but will be saved as a separate file.
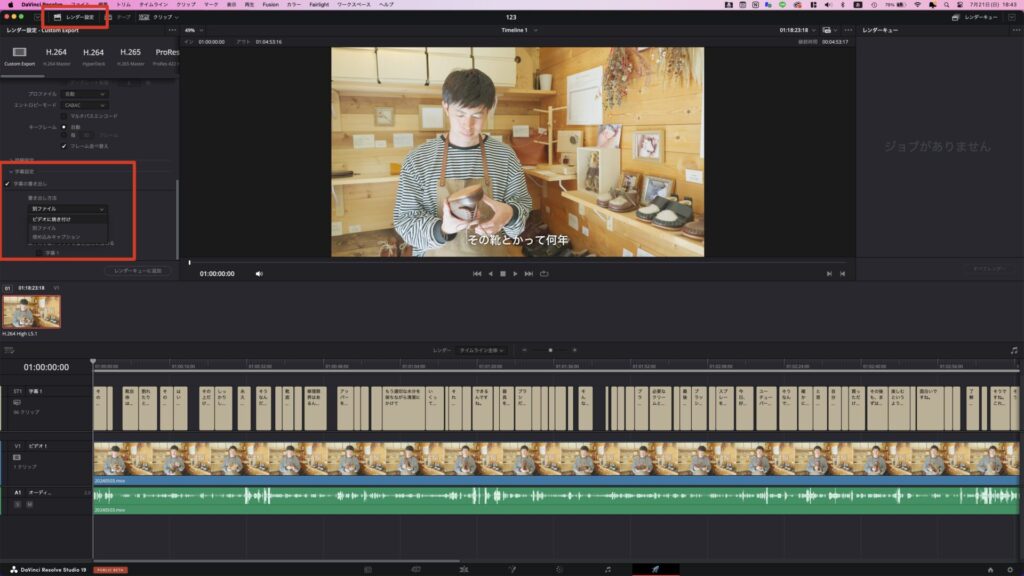

- Execute Export:
- Once settings are configured, click “Add to Render Queue,” then in the Render Queue panel, click “Start Render” to begin the export process.
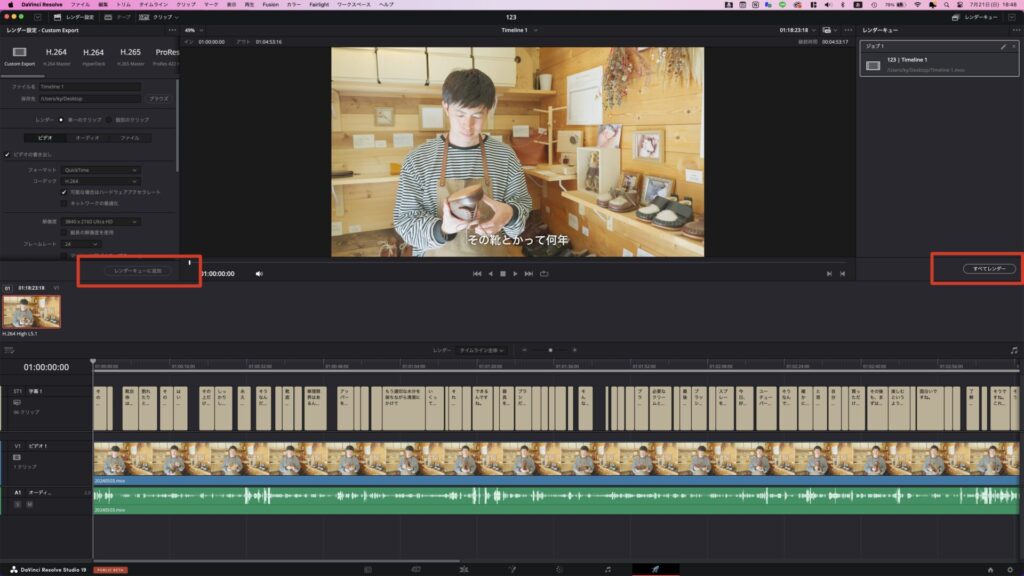

This will export the video with the subtitles burned in.
Summary
In this article, we provided a detailed explanation of the basic operations of DaVinci Resolve and its latest automatic subtitle feature. Notably, the auto subtitle feature supports Japanese and can significantly enhance video editing efficiency. For those just starting with DaVinci Resolve, we encourage you to use this article as a reference to edit videos effectively.



Comments